Creating a Time-lapse Camera with HypriotOS/Docker using a Raspberry Pi 3B+ and Raspberry Pi Zero W
I have recently started a project that requires the ability to create a time-lapse video over a set duration. Looking at all the possible ways of achieving this, I felt that a Raspberry Pi would be well suited for the job. In this post, I will discuss how I went about setting up both a Raspberry Pi 3 Model B+ and a Raspberry Pi Zero W with HypriotOS to run a Docker-based time-lapse camera Node application.
The decision to run the Node application within Docker provides me with the best flexibility for updating and adding further functionality to the devices at a later date.
The Setup
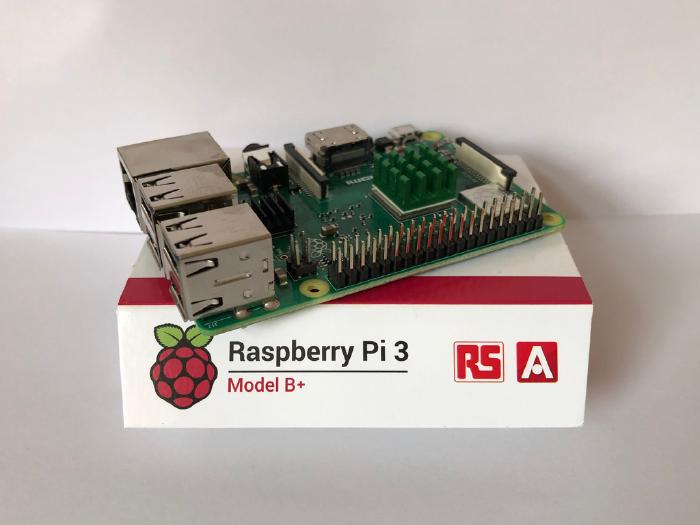
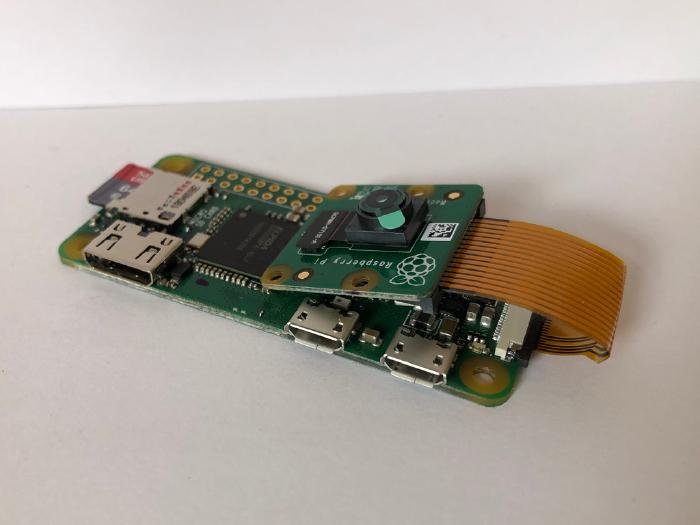
I decided on using both a Raspberry Pi 3 Model B+ and a Raspberry Pi Zero W in order to experiment with the two different form factors. I wanted to see how well each would perform with the given workload. Both Pis allow you to connect the Raspberry Pi Camera Module v2 so that you can control how and when a photo is taken.


Building the Node Application
Now that I had decided on the equipment I was going to use, the next task was to create the timelapse.js Node application.
The application is a simple script which uses setInterval to block and call the given shoot function with the desired delay.
Photos are organised into a deterministic /year/month/day/hour/ directory structure, and each photo follows a year_month_day_hour_minutes_seconds.jpg naming convention.
The actual act of taking the photo (with the desired options) is delegated to the raspistill command-line tool provided by the Raspberry Pi organisation.
const { mkdirSync } = require('fs');
const { execSync } = require('child_process');

const toMilliseconds = seconds => seconds * 1000;

const getCurrentDate = () => {
  const now = new Date();
  const pad = number => number.toString().padStart(2, '0');

  return {
    year: now.getFullYear(),
    month: pad(now.getMonth() + 1),
    day: pad(now.getDate()),
    hours: pad(now.getHours()),
    minutes: pad(now.getMinutes()),
    seconds: pad(now.getSeconds()),
  };
};

const getDirectoryPath = path => {
  const { year, month, day, hours } = getCurrentDate();

  return `${path}/${year}/${month}/${day}/${hours}`;
};

const getFileName = path => {
  const { year, month, day, hours, minutes, seconds } = getCurrentDate();

  return `${path}/${year}_${month}_${day}_${hours}_${minutes}_${seconds}.jpg`;
};

const shoot = (basePath, options) => {
  const directory = getDirectoryPath(basePath);

  mkdirSync(directory, { recursive: true });

  const file = getFileName(directory);

  const output = execSync(`/opt/vc/bin/raspistill ${options} -o ${file}`);

  console.log(file);
};

const delay = process.env.TIME_DELAY || 30;
const basePath = process.env.BASE_PATH || '/var/photos';
const options = process.env.OPTIONS || '';

console.log(`Delay: ${delay}s, Path: '${basePath}', Options: '${options}'`);

setInterval(shoot, toMilliseconds(delay), basePath, options);
This script was then packaged into a Docker image using the following Dockerfile file.
FROM balenalib/raspberry-pi-debian-node:11.3.0-stretch-run
RUN apt-get update -y && apt-get install libraspberrypi-bin -y
COPY timelapse.js /var/timelapse.js
VOLUME /var/photos
CMD ["node", "/var/timelapse.js"]
The image ensures that the user-land Raspberry Pi libraries are available (giving us access to raspistill) and provides us with a volume we can mount to our host OS, so as to persist photos taken regardless of the current container instance going away.
With these two files in place, I was now able to build and push the image to Docker Hub for later use on the Raspberry Pis.
Building the HypriotOS Image
The Hypriot project takes a lot of the pain out of getting set up with using Docker on the Raspberry Pi and its ARM architecture. It also includes the cloud-init library which allows you to clearly define how you wish the instance to be provisioned on first boot.
In regards to the two time-lapse devices, I used the following cloud-config, specified in user-data.yml.
#cloud-config

hostname: timelapse
manage_etc_hosts: true

users:
  - name: pi
    gecos: 'Raspberry Pi'
    sudo: ALL=(ALL) NOPASSWD:ALL
    shell: /bin/bash
    groups: users,docker,video
    plain_text_passwd: password
    lock_passwd: false
    ssh_pwauth: true
    chpasswd: { expire: false }

locale: 'en_US.UTF-8'
timezone: 'Europe/London'

write_files:
  - content: |
      allow-hotplug wlan0
      iface wlan0 inet dhcp
      wpa-conf /etc/wpa_supplicant/wpa_supplicant.conf
      iface default inet dhcp
    path: /etc/network/interfaces.d/wlan0
  - content: |
      country=GB
      ctrl_interface=DIR=/var/run/wpa_supplicant GROUP=netdev
      update_config=1
      network={
        ssid="ssid"
        psk="password"
        proto=RSN
        key_mgmt=WPA-PSK
        pairwise=CCMP
        auth_alg=OPEN
      }
    path: /etc/wpa_supplicant/wpa_supplicant.conf

runcmd:
  - 'systemctl restart avahi-daemon'
  - 'ifup wlan0'
  - 'mkdir -p /home/pi/photos'
  - [
      docker, run,
      "-d", "--privileged",
      "--restart", "always",
      "--volume", "/home/pi/photos:/var/photos",
      "--name", "timelapse",
      "--env", "TIME_DELAY=30",
      "--env", 'OPTIONS=""',
      "eddmann/pi-timelapse"
    ]
This provisions the given instance with the desired user account, WiFi access and starts the Docker container instance with the provided options.
As well as this definition, I was also required to ensure that the camera module was enabled.
To do this, I created a boot-config.txt file as follows.
hdmi_force_hotplug=1
enable_uart=0

# camera settings, see http://elinux.org/RPiconfig#Camera
start_x=1
disable_camera_led=1
gpu_mem=128

# Enable audio (added by raspberrypi-sys-mods)
dtparam=audio=on
With these two files now defined, I was able to use the flash script provided by Hypriot to easily write the given image to two separate MicroSD cards. The only varying factor per image was the desired hostname, and as such I was able to supply this whilst invoking the flash script.
flash \
  --hostname timelapse \
  --userdata user-data.yml \
  --bootconf boot-config.txt \
  https://github.com/hypriot/image-builder-rpi/releases/download/v1.10.0-rc2/hypriotos-rpi-v1.10.0-rc2.img.zip
With both the Docker and Raspberry Pi HypriotOS images now written, I was able to move on to actually experimenting with the devices. 📸
Booting the Raspberry Pi Time-lapse Camera
After inserting MicroSD cards into each Raspberry Pi, I was able to access both devices via SSH using the chosen hostnames (i.e. timelapse.local).
The Docker container had been successfully configured to start at boot time and would restart automatically in the event of any errors.
The only step now is to wait for the time-lapse to complete, and then finally I can stitch the images together using some simple video editing software.