LaTeX, an Introduction
LaTeX (pronounced lay-tech) is a document preparation system that provides high-quality typesetting using the WYSIWYM ideology. Based on Donald E. Knuth’s TeX typesetting language, LaTeX was developed in 1985 by Leslie Lamport and has become a staple in academia. It has also become the required text processing language for many periodicals.
Below are some of the key features found in LaTeX:
- Focuses the author on content rather than presentation, emphasising separation of concerns.
- Handles complex mathematical equations with great ease.
- Renders scalable vector graphics (.svg).
- Provides professional font handling and kerning.
- Automatically generates bibliographies, tables of contents, figures, etc.
- Is platform/application agnostic due to its use of plain text files.
One key aspect to stress is that LaTeX is not a word processor but rather a markup language, which may be more appealing to developers. This means that it doesn’t require any dedicated software to create or modify documents. All LaTeX documents are plain text files (.tex) that can be edited using any plain text editor (such as VIM or Emacs). These markup text files can then be processed using LaTeX into various formats, such as device output files (.dvi) or Adobe portable documents (.pdf).
Installation
There are installation packages available for all major platforms. If you are using OSX, an installer can be found at MacTeX, which also bundles TeXShop - great for quick experiments. Windows users can head to proTeXt, which follows a similarly simple installation process as its Mac variant.
Basics
Creating a simple LaTeX document is very straightforward. Similar to how you structure an HTML document, a basic LaTeX structure is required.
\documentclass{article}
\begin{document}
Hello LaTeX!
\end{document}
In just a few lines, we can create a document that can be easily processed using LaTeX into a variety of formats. The first line specifies how to format the document (heading, spacing, etc.). There are many different document formats available, ranging from minimal to book - though further explanation is beyond the scope of an introductory article. The final block of required markup is the document contents.
$ pdflatex hello.tex
Finally, to generate the sample document as a PDF, the command above must be executed in the terminal. The resulting PDF from running this command is available here.
More Advanced
Now that we are familiar with the basic process of creating and generating output from a LaTeX document, we can begin to explore some of the more powerful features available. As mentioned at the beginning of this article, LaTeX provides a toolkit full of features that ease the creation of both small and large documents of various types.
\documentclass{article}
\usepackage{graphicx}
\begin{document}

\begin{center}
  \includegraphics[width=3cm]{latex-logo.png}
\end{center}

\begin{tabular}{ | p {3cm} | p{5cm} | }
  \hline
  \textbf{Player} & \textbf{Position} \\ \hline
  LeBron James & Small Forward \\ \hline
  Dwayne Wade & Point Guard \\
  \hline
\end{tabular}

\end{document}
The above example demonstrates multiple features available, ranging from including a resized image to creating a formatted table (the resulting output is available here).
In this example, you will notice that the primary difference from the basic code snippet is the use of packages.
To expand the functionality of LaTeX in a modular fashion, you can import various packages for use in your document.
The package imported above allows us to include and display graphics.
In addition to displaying the graphic, we have also defined the desired width of the image.
Various units (mm, cm, pt) can be used to define the size while maintaining the image’s aspect ratio.
The formatted table displayed has two columns and three rows.
The column widths are defined in the table declaration, and \\ is used to indicate the end of a row’s content.
Other notable syntax used includes the command \textbf to bold the column titles, & to separate the row contents into columns, and \hline to insert horizontal lines.
Wrap Up
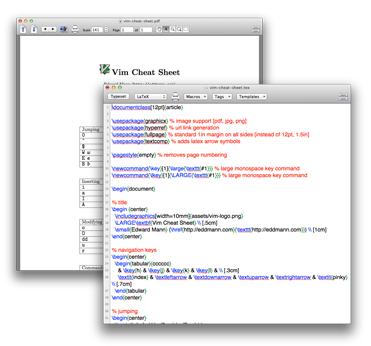
I hope that this post has provided you with enough information to help you begin using LaTeX and has perhaps convinced you to delve a little deeper into its many powerful features. If you are looking for a more in-depth overview of individual aspects of LaTeX, use the resources provided below as a good starting point. Additionally, you are welcome to check out a heavily commented VIM cheat sheet I have created using many of LaTeX’s prominent features. This document is available here on GitHub, and pull requests are highly welcome.